Thursday, October 31, 2013

Italian Sausage Stuffed Bell Peppers

You'd think I'd be prepared.


We're having guests tomorrow.  Well, technically, it's my family, which can hardly constitute as guests, but we're having people coming to stay with us in our home, sleep in our beds, eat our food, use our toilet.  I'm not complaining.  It's what guests do.  And I'm thrilled to share our space and our toilet paper with the ones I love.

Linens have been laundered, activities have been planned, a belated birthday gift has been wrapped. 

But I'm in a bit of a pickle.  They arrive tomorrow night and I'm stumped on dinner.  I've been thinking and overthinking about it all darn day.  You see, I've been making these stuffed bell peppers a lot for Nathan and me, and they're mighty delicious, but they're just not something I would serve to my family on the night of their Texas arrival.  They're more of a meat and potatoes kind of family (no, we're not farm people, but I actually had someone at work the other day tell me he could see me growing up on a farm.  Um no.  If you know me at all this is as far from my personality as you can get.  I don't do farms.  I don't do camping.  I don't do dirty, sweaty things.  I'm very much a girl).  But my parents like meals with a piece of meat (and a side of wine)- like a filet of steak or a breast of chicken.  That sort of thing.  And for some reason it's tearing me up inside.

Nathan wasn't much help when I phoned him in Austin this evening (yes, I'm greeting the trick-or-treaters solo tonight), and the fact that he is expected to mow the yard and clean up the unfinished bathroom upon his arrival tomorrow morning is really all I can ask of him.  Dinner is up to me.  And dinner I shall serve.

oh, and the best part of this little visit?  i'm gonna get to see this guy and this girl.

Italian Sausage Stuffed Bell Peppers

Serves 2

1/2 cup uncooked instant brown rice
2 teaspoons olive oil
1/2 cup chopped yellow onion
1/2 teaspoon salt
1/2 teaspoon ground black pepper
1 garlic clove, minced
1/2 teaspoon oregano
1/4 teaspoon fennel seeds
1/2 cup ground italian sausage crumbles (I use Jimmy Dean Fully Cooked Sausage Crumbles)
1/8 cup grated parmesan
2 green bell peppers

Cook rice according to package directions.  Set aside.

Cut top off peppers 1/2 inch from the stem end and remove seeds (reserve and chop up the top of the pepper around the stem to add to the filling mixture).  Place standing up in baking dish (for two peppers I used a 9x5-inch loaf pan).  Set aside.

In a medium skillet, heat olive oil over medium heat.  Add onion and chopped bell pepper; sprinkle with salt and pepper.  Stir often, until soft and translucent.  Add garlic, and cook for one minute.  Add oregano, fennel seeds, sausage, and rice.  Toss and cook until warmed through.  Divide mixture between each bell pepper, pressing down with the back of a spoon until full.  Bake at 350 degrees for 20 minutes.  Sprinkle with parmesan and cook for 10 minutes more, until cheese is melted.


Thursday, October 24, 2013

Cranberry Cornbread

Martha Stewart made a boo boo.


And I'm not talking about a scary ghost boo boo.  She made a remark that horrified bloggers everywhere. 

See for yourself {video at 1:40}.

Read for yourself {below}:

“Who are these bloggers? They’re not trained editors and writers at Vogue magazine. I mean, there are bloggers writing recipes that aren’t tested, that aren’t necessarily very good or are copies of everything that really good editors have created and done. Bloggers create kind of a ‘popularity‘. But they are not the experts and we have to understand that.”

Ouch.

Now I have been a Martha fan for as long as I can remember (was I the only nerd who enjoyed watching Martha Stewart Living on summer mornings during my adolescence?), and I'll admit I'm no trained professional, nor is everyone going to love every one of my recipes (heck, there are plenty of recipes I post that Nathan doesn't like- this means I eat the whole pie).  No one is editing my [random] writing (editors would probably cry if they had to proofread my weekly blurbs) and I'm far from the domestic diva Martha is, but, unfortunately, that comment left a sour taste in my mouth. 

To me, blogging is a creative outlet.  I share whatever I want to whoever is interested and try new things in the kitchen just so I can indulge the handful of people who are actually reading this little corner of the internet that is mine.  It's fun, it steps me outside of my usual culinary comfort zone, and I'm definitely not in it for the money (I've probably made about 25 cents since the inception of Serves Two, and if I were more motivated to make it "big"- because you can make a big chunk of change if you put your heart and soul into a blog- I might just dabble in some advertising and whatnot), but I do it for me.  And for you, whoever is reading this. 

I get ideas from magazines, cookbooks, the internet, television, and two of my favorite sources for information: my brain and other blogs.  Blogs are real.  They're people just like you and me cooking in their own kitchen, taking pictures with their own cameras, sitting down at their own computer and sharing with the world wide web.  You don't get quite the same realness when you're flipping through Bon Appetit,...or Vogue

So today I give you Cranberry Cornbread.  A buttery crusted cornbread tossed with fresh and dried cranberries imparting both tartness and sweetness, then baked in a skillet.  The recipe just so happened to originally have come from Martha, but I found it on a blog.  And the cranberry addition?  It was my own idea.  And it's a good thing.

Cranberry Cornbread

Makes one (8-inch) skillet (double recipe for 10.25 or 12 inch skillet)

1/2 cup yellow cornmeal
1/2 cup + 2 tablespoons all-purpose flour
1 tablespoon granulated sugar
3/4 teaspoon baking powder
1/4 teaspoon baking soda
3/4 teaspoon salt
1 cup buttermilk
1 egg yolk
2 tablespoons unsalted butter, cut into 4 pieces
1 tablespoon cornmeal
1/2 cup fresh cranberries
1/3 cup dried cranberries

Preheat oven to 425 degrees.  In a medium bowl, whisk together the cornmeal, flour, sugar, baking powder, baking soda and salt. In a large measuring cup, whisk together the buttermilk and egg. Pour the buttermilk mixture into the dry ingredients and, using a rubber spatula or large wooden spoon, stir the batter together until completely combined.  Toss cranberries with 1 tablespoon cornmeal.  Fold into batter.
Put the butter in a 8-inch cast iron skillet and place the pan in the oven until the butter is melted, about 3 to 5 minutes. Remove the skillet from the oven, swirl the butter around to coat the bottom and sides, then pour the batter into the pan. Smooth the top and bake until a skewer inserted in the middle comes out clean, about 15 to 20 minutes. 

Adapted from Brown Eyed Baker.  Originally from Martha Stewart.

Thursday, October 17, 2013

Basil Salt (diy)

It's rumored that couples tend to resemble one another.


They're usually close in age, have achieved the same level of education, are the same ethnicity, display the same level of attractiveness, etc.  And the longer they're together, the more alike they become (ps those who resemble one another the most report the happiest marriages).*

Nathan sprinkles salt on, well...everything.  Mac and cheese, tacos, sub sandwiches, pizza, you name it.  I sprinkle salt on warm tortilla chips, crispy french fries, scrambled eggs.  Nothing crazy. 

Until now.  I now put salt on my pizza.  This basil salt.  It's the new grated parmesan.  A simple mixture of coarsely ground kosher salt with a big punch of fresh basil blended in (basil is the only herb I grew this summer that escaped the wrath that is the Texas heat), it goes perfect on those frozen pizzas I've been so good about serving up for dinner lately.  And sprinkled on buttered, toasted french bread alongside [frozen] lasagna.    

I think we're soul mates.

Basil Salt

1/2 cup basil leaves, packed
1/2 cup coarse kosher salt

Preheat the oven to 225 degrees.  Line a baking sheet with parchment paper and set aside.

In the bowl of a food processor, add basil leaves and salt.  Pulse until basil leaves are ground.  Spread mixture out evenly on prepared baking sheet.  Bake for 20-30 minutes until mixture is dry.  Break up any clumps that may have formed with your fingers.  If necessary, pulse mixture in food processor to achieve desired coarseness (or to a fine powder, if you choose).  Store in an airtight container.

Adapted from The Little Epicurean.
*Happier at Home.  (highly recommended read)

Saturday, October 12, 2013

Double Chocolate Pumpkin Pie

It's high time I made you a pie.


But this is not your ordinary pumpkin pie (thank goodness because, if I'm being honest...and I'm going to be...I don't really like pumpkin pie).  I'm in the pecan pie camp.  And after last year, I'm in the apple pie camp as well.  But this pie here might just make me a pumpkin pie convert.

After last years pumpkin kiss cookies (one of my most popular posts, per readers) and the triple chocolate cupcakes with pumpkin pie frosting (one of my most popular posts, per me), I decided to kick pumpkin pie up a notch with the addition of chocolate. 

Melted morsels get mixed into the classic pie filling, which then gets poured into a chocolate oreo crust.  I opted for pre-made because I'm lazy, which isn't news to you considering I wrote one measly blog post during the entire month of September.  I'm ashamed.  I'm sorry.  So I made you a pie.


Double Chocolate Pumpkin Pie

Makes 1 (9-inch) pie

1/2 cup semisweet chocolate morsels
2 tablespoons unsalted butter
1 can (15-ounce) solid-pack pumpkin
1 can (12-ounce) evaporated milk
3/4 cup granulated sugar
2 large eggs
1 tablespoon cornstarch
1 teaspoon pure vanilla extract
1 1/2 teaspoons coarse salt
1 teaspoon ground cinnamon
3/4 teaspoon ground ginger
1/4 teaspoon ground nutmeg
1/8 teaspoon ground cloves
1 prepared Oreo pie crust (homemade or store bought)

Preheat oven to 325 degrees.  Melt chocolate and butter in large sauce pan over medium-low heat stirring constantly until melted (stir constantly to prevent burning the chocolate!).  Once blended, turn off stove and stir in pumpkin.  Whisk in milk, sugar, and eggs.  Add cornstarch, vanilla, salt, and spices.  Whisk until combined.  Pour mixture into prepared pie crust (I had extra filling).  Bake at 325 degrees for 50-60 minutes until center is set but still jiggly.  Let cool before slicing and serving.  Store leftovers in fridge.

Adapted from Closet Cooking.

Saturday, August 31, 2013

Barbecue Chicken Salad

Changes are taking place...


so that means you eat the same things.

Like pizza, and burgers, and frozen lasagna, and...chicken salad. 

I had absolutely no intention on sharing yet another chicken salad recipe with you at least until summer 2014, but then this happened and I simply couldn't resist.  I threw this together on a whim one day (several weeks ago, actually.  I've been MIA, if you haven't noticed.  Like I said though, there are some changes taking place in our lives- more on that at a later time, but no, I'm not bearing child) and it was love at first bite.  But we're kind of barbecue freaks in this house.  It's sweet and spicy and tangy and perfectly acceptable this labor day weekend.  And a heckuvalot more up my alley than smoking a brisket.

omgbbq.


sorry, keeping it short today folks!  hopefully i'll be back in the blogging swing of things soon!


Barbecue Chicken Salad

1 large chicken breast, cooked and chopped
1 stick celery, chopped
1/4 cup red onion, diced
1/3 cup corn kernels
1/2 teaspoon italian seasoning
1/2 teaspoon salt
1/4 teaspoon pepper
2 tablespoons mayo
2 tablespoons barbecue sauce (I used Head Country Hot for a little kick!)

Combine chicken celery, onion, and corn.  Sprinkle with italian seasoning, salt, and pepper and toss.  Add in mayo and barbecue sauce; toss to coat.  Refrigerate for one hour or until ready to eat.

Chelsea Original :)

Monday, August 12, 2013

Lemon Cake with Coconut Marshmallow Frosting and Toasted Coconut

So I'm sure you've figured that I have feelings for you now.


I’m talking to you, Lemon Cake.

And five years ago I said these words to Nathan and we finally became a couple. It was the best decision I’ve ever made.

He is absolutely hilarious (today I endured a brief dance breakout at Lowe’s and some very enthusiastic singing in the car), incredibly thoughtful (he’s the guy to thank for my beloved stand mixer and chi flat iron, as well as the occasional “because-I-love-you” donut, and I'll never forget that perfect proposal), does a mean worm (and has a scar on his chin to prove it), is the most adorable sleeper (we’re talking arms stretched behind his head as if he’s posing for a Levi’s ad), and has a pretty face to look at (yea, he’s a stud). It’s kind of hard to put into words how much I love this guy.

So in honor of five years with the man of my dreams, I made us a celebratory cake. Bursting with lemon, topped with a coconut marshmallow frosting and flaked, toasted coconut, it’s just a little gesture to say I love you, Nathan.

And thanks for letting me change my facebook status.


Lemon Cake with Coconut Marshmallow Frosting and Toasted Coconut

Makes one (9-inch) springform pan

2 cups all-purpose flour, sifted
2 teaspoons baking powder
1/4 teaspoon salt
1/2 cup unsalted butter, melted and cooled
2 large eggs
1 cup granulated sugar
2 teaspoons vanilla extract
the zest of 3 lemons
1/2 cup fresh lemon juice (this was 3 lemons for me)
3 tablespoons milk

Marshmallow Frosting
4 large egg whites
1 cup granulated sugar
1/4 teaspoon cream of tartar
1 teaspoon coconut extract
1/2 cup unsweetened, flaked coconut, toasted if desired

Preheat oven to 350 degrees. Spray a round 9-inch cake pan (mine was springform) with nonstick spray.

In a small bowl, whisk together sifted flour, baking powder and salt.  In a large bowl, whisk together eggs and sugar until smooth and creamy. Add in cooled butter and vanilla extract, whisking until combined. Stir in all of the lemon zest. Add half of the flour mixture, stirring well, then add in the lemon juice and milk. Stir in remaining dry ingredients until batter is smooth. Pour into the greased 9-inch pan and use a spatula to even out the batter. Bake for 20-25 minutes, or until cake is set and springs back when touched. Remove and let cool completely.

To make the frosting, combine the egg whites, sugar and cream of tartar in a heat-proof bowl, preferably the bowl of your electric stand mixer. Place over top of a double-boiler that contains simmering water, and whisk constantly for 3-4 minutes until the sugar has dissolved and the egg whites are slightly warm. Immediately remove the bowl and place it on your stand mixer with the whisk attachment, beating slow at first and gradually increasing the speed to high. Beat for 6-7 minutes until glossy and thick, then beat in coconut extract for another minute until combined. Frost cake as desired, then top with coconut!

Adapted from How Sweet It Is.

Thursday, August 8, 2013

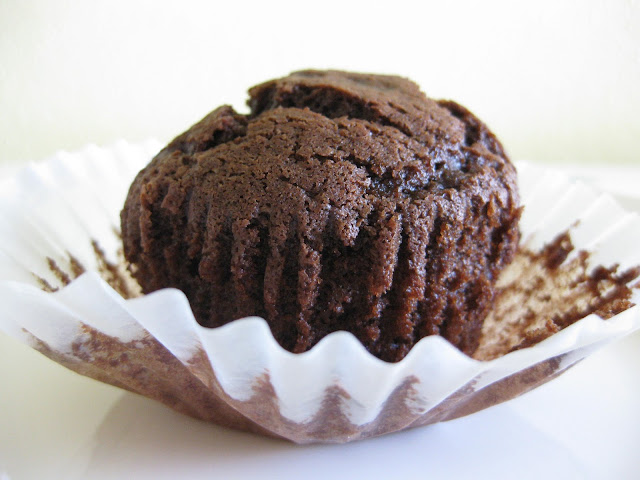
The Ultimate Chocolate Cupcake: Mission Complete

This is it baby.


It took one year, seven rounds, fifty+ Official Cupcake Explorers who at long last found one chocolate winner.

Let’s start at the beginning. Last June I was chosen to participate in the quest for the Ultimate Chocolate Cupcake for the incredibly creative blog The Cupcake Project. I wrote up a little blurb as to why I should be chosen. It went along the lines of I have a blog, I’m a baker, I’ve made the Ultimate Vanilla Cupcake, blah blah blah. Anywho, my wit and words won me a prized spot in this little venture. (And you should have seen the celebration. Bouncing-in-my-seat, hands-in-the-air ecstatic. Luckily, in the privacy of my own home).

And so the quest began. All seven rounds, as it turned out. The goal was a 60 percent vote by Explorers to agree that Yes! This is the Ultimate! Now I won’t lie, I did vote rounds 2 and 6 as winners, and every round had its pros (nicely domed, easy to follow recipe, wonderfully sweet) and cons (ugly appearance, too dense, somewhat dry), but all that turned around when I received Round 7’s recipe in an email mid-May.

Perfect everything. Perfect appearance, perfect crumb, perfect density, perfect texture, perfect chocolate flavor, perfect sweetness; ultimately perfect!

And so, without further ado, I give you…

The Ultimate Chocolate Cupcake!!


See Stef’s Blog, The Cupcake Project, for more reviews about the Ultimate Chocolate Cupcake!


The Ultimate Chocolate Cupcake

Makes 12 cupcakes

1/4 cup unsalted butter, room temperature
1 cup sugar
2 ounces of your favorite chocolate (you can use any plain chocolate that you like except white chocolate or candy melts. The chocolate doesn't have to be one typically earmarked for baking- any chocolate that isn't flavored and doesn't contain mix-ins like nuts, krispies, nougat, etc. will work.)
2 large eggs, room temperature
2 large egg yolks, room temperature
1/2 cup + 1 tablespoon vegetable or canola oil, measured in a liquid measuring cup
2 teaspoons vanilla extract
1/3 cup full-fat sour cream
1 cup all-purpose flour
1/2 teaspoon salt
1/2 teaspoon baking soda
1/2 cup cocoa powder
1/2 cup room temperature water, measured in a liquid measuring cup

Preheat oven to 350 degrees. In a medium-sized mixing bowl or the bowl of a stand mixer, mix butter and sugar until fully combined. The end result should look like wet sand.

Melt the chocolate in the microwave or in a double boiler. Once the melted chocolate is cool enough to touch, add it to the butter/sugar mixture and mix until just combined. Mix in eggs and egg yolks one at a time until just combined. Mix in oil, vanilla, and sour cream until just combined.

Sift together flour, salt, baking soda, and cocoa powder into a separate medium-sized bowl. Use a fork or a whisk to ensure that the ingredients are mixed well after sifting. Add dry ingredients to wet ingredients in three additions, mixing until just combined after each addition. Mix in water until just combined.

Fill cupcake liners 2/3 full and put in the oven. Check for doneness at 18 minutes - a toothpick inserted into the center of a cupcake should come out clean. If they are not done, check again every two minutes until they are done. (Mine took 20 minutes!)

Immediately remove cupcakes from the cupcake tin and place on a cooling rack or on the counter to cool to room temperature.

[If you would like to add coffee to the recipe, either add 1 teaspoon espresso powder or instant coffee granules along with the sifted dry ingredients, or replace the water with room temperature brewed coffee.]

Adapted from The Cupcake Project.